
Create a Highly Flexible Data Visualization Interface Using React
In this guide, we’ll break down how to build an app with React – a JavaScript library for crafting user interfaces. This tool shines when it comes to building components, offering clear advantages over tools like jQuery.
The ability to create self-contained, reusable components helps keep your code lean and organized. When components are set up right, you can drop them in wherever needed with zero extra setup.
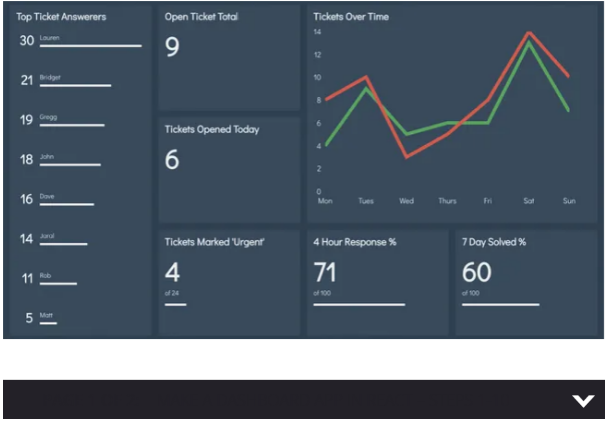
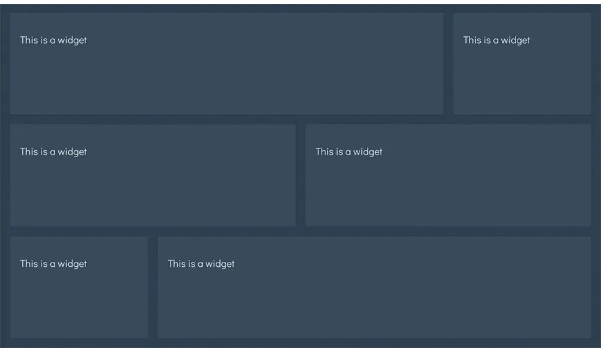
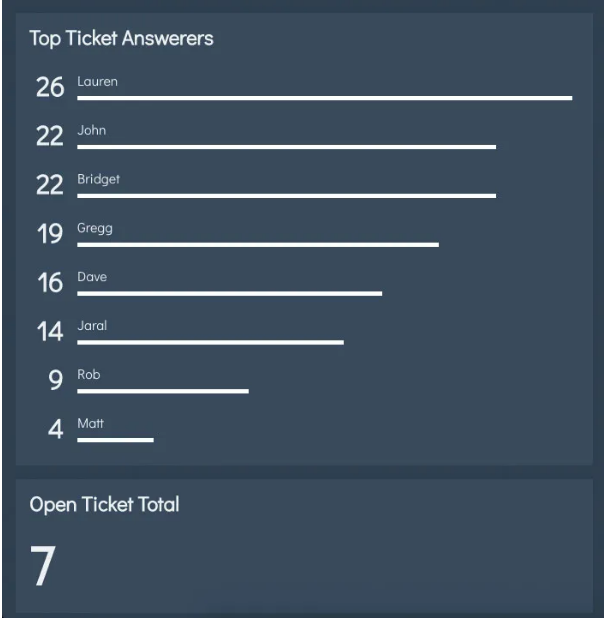
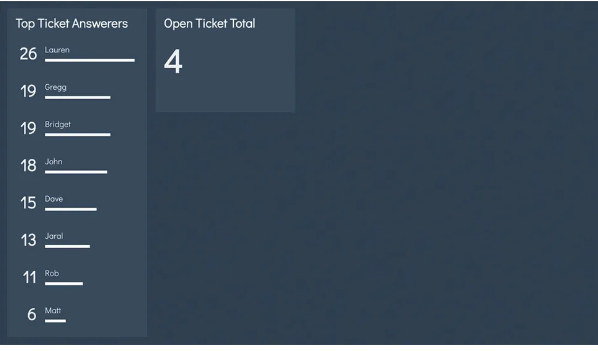
We’re going to build a dashboard app that tracks key support metrics. The screen will be laid out in a grid, customizable to display different visuals based on the data it needs to show.
Need to build a website instead of an app? Check out our roundups of the best website builders and web hosting services.
● 19 top jQuery plugins
By creating a generic widget component, we can mix and match displays without messing with the underlying code. Wrapping these widgets in a container component lets us control where the data comes from, separate from how it’s shown.
We’ll use CSS Grid to arrange content in defined blocks. Browsers that don’t support CSS Grid will default to a single column, just like they do on smaller screens.
01. Get the required dependencies
Once you’ve got the project files (and saved them to cloud storage), you’ll need to pull in all the packages required for the project. These include files from ‘create-react-app,’ which handles the build process for us.
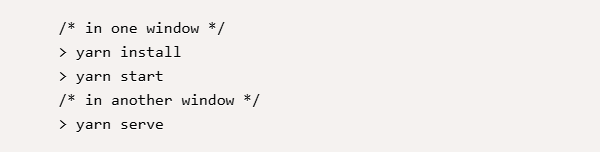
We’ll also need to run two servers: one for hot reloading the page and another to serve fake test data.
Run the following command in your project directory’s command line:
02. Add your first widget
To kick things off, we’ll render a simple component on the page. With Babel set up, we can write components using ES2015 class syntax. Just import them when needed, and Babel with Webpack will handle the rest.

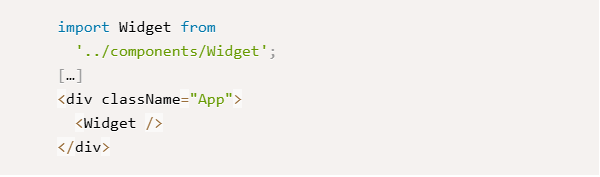
Open /src/components/App.js and add the import at the top. Then, in the render function, place the component inside the container <div>.
03. Style the widget box
In this project, Webpack is configured to recognize CSS imports. That means we can import CSS files the same way we imported JavaScript in the last step, letting us create separate stylesheets for each component.

Add the following import at the top of Widget.js. This will link to the ‘Widget’ className and scope styles to that component.

04. Add a heading and content
Each widget needs a short description of the data it’s showing. To keep this flexible, we’ll pass this in as a property – or ‘prop’ – when we use the component.
As for the content, React has a special ‘children’ prop that holds whatever content is placed between a component’s opening and closing tags.
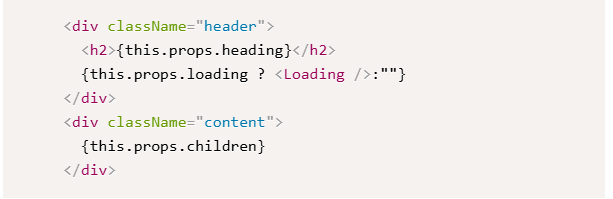
Replace the placeholder <p> in the render function with the code below. We’ll use the Loading component later.
05. Let the widget span the grid
Beyond imported stylesheets, we can also create dynamic React styles based on the props passed in.
To make a widget span columns and rows in CSS Grid, we use the grid-column and grid-row properties. We can pass ‘colspan’ and ‘rowspan’ props to adjust this per component, similar to how table cells work in HTML.
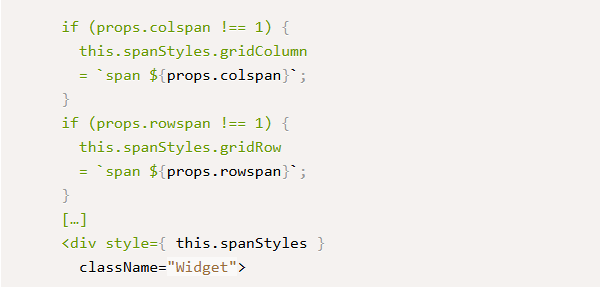
Add styles in the Widget constructor and link them to the container <div>.
06. Set default props
Right now, our Widget is empty because we haven’t passed any props. In cases like this, we can set default props to use instead.
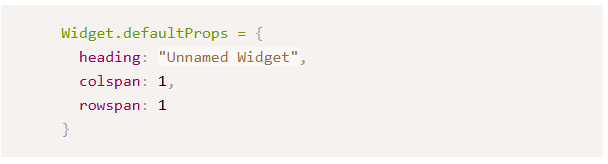
By default, CSS Grid items take up the smallest space possible – here, a 1×1 square – unless told otherwise. Just before exporting the Widget, set default props to reflect this.
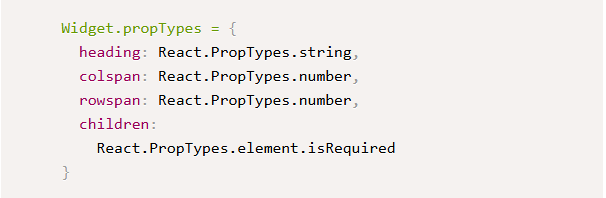
07. Enforce specific prop types
Components can specify what types of values should be passed as props. During development, any incorrectly passed props will show up as console warnings, helping you catch bugs early.
Right below the default props, define which props are required (or optional) and what type they should be.
08. Add props to the app
Since we defined the ‘children’ prop as required, you might notice the browser complaining that it’s undefined. It won’t break the app, but it’ll keep bugging you until fixed.

Head back to App.js and add a heading prop to the widget we made earlier. Instead of using a self-closing tag, open it up and add placeholder content to test it out.
09. Display some data
The NumberDisplay component works just like the widget we built – it renders text based solely on the props passed in. We can drop it anywhere we need a consistent way to show numerical data.
Import the NumberDisplay component at the top and use it to replace the placeholder content you added in the Widget.

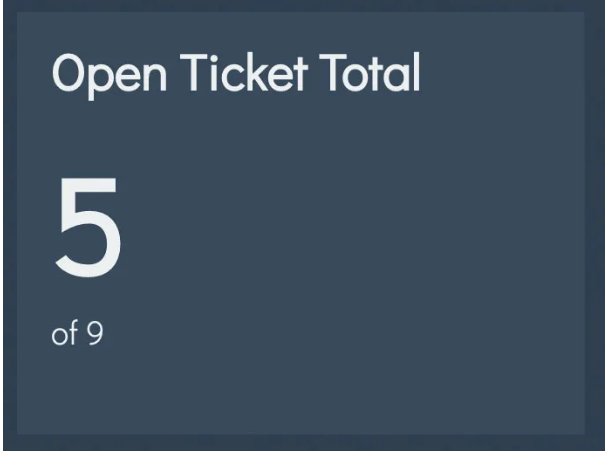
10. Turn it into a NumberWidget
Right now, we’re using a lot of code to display something that won’t change across widgets. We can create a dedicated component to wrap all that up. That way, we only need to import NumberWidget.
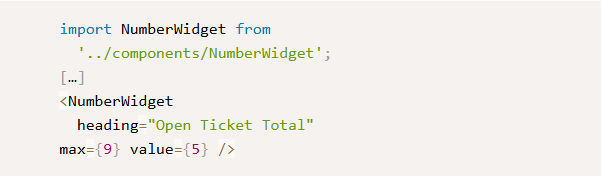
Replace the Widget and NumberDisplay imports at the top of App.js with NumberWidget. Be sure to update them in the render method too.
11. Add a progress bar
Inside NumberWidget.js, there are a few methods that help render content under specific conditions. We can call these in the render method to output what we need.
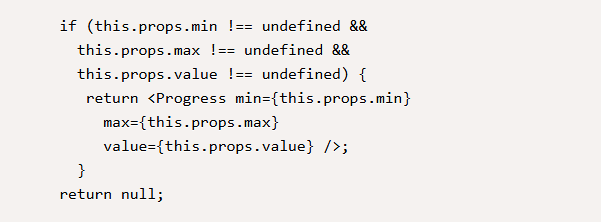
In showProgress(), add code to determine if a progress bar should render. At minimum, we’ll need a minimum value, maximum value, and current value.
12. Add a Container component
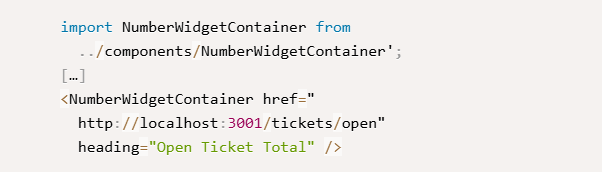
Manually adding data isn’t practical. We can wrap NumberWidget in a container that fetches fresh data from our server. In App.js, replace what we added in step 10 with NumberWidgetContainer and pass it a URL to load data from.
13. Fetch data on load
Throughout a React component’s lifecycle, it calls various methods depending on its current state. The componentDidMount method runs when a component first renders, making it perfect for fetching data.
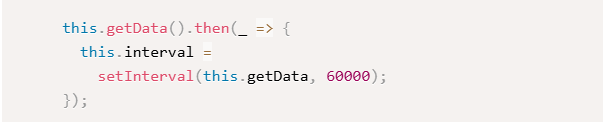
Add the following to componentDidMount in NumberWidgetContainer.js. This will call fetchData now and every minute after. We’ll fix the TypeError in the next step.
14. Update the state
Each component has its own internal state, which stores information about itself at any given time. We can pass this state to other components as props.
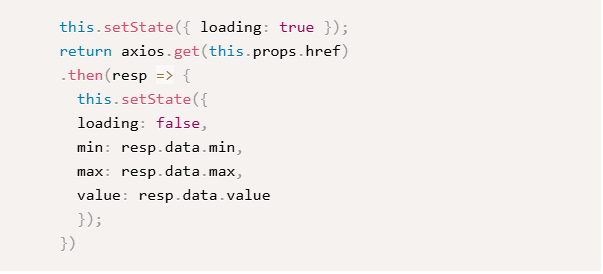
Use the Axios AJAX module to request data from the URL in the href prop, then update the state with the returned values. These will automatically get passed to NumberWidget, which will update itself.
15. Add a List widget
The groundwork we laid for NumberWidget works for other widget types too. ListWidgetContainer can take the same props as NumberWidgetContainer but will render a list of values instead.
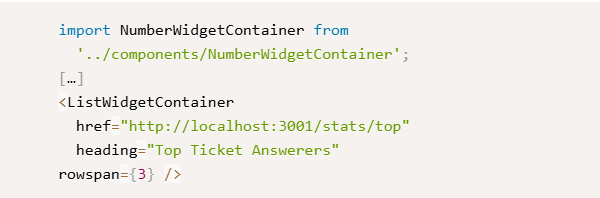
Import ListWidgetContainer along with the others, and place it just above NumberWidgetContainer in the render method.
16. Show list items
With data in the sortedItems array, we can loop through the results and render a separate component for each.
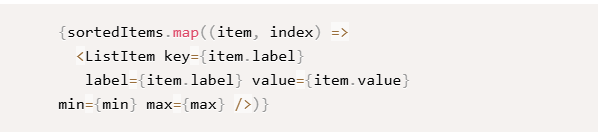
We’ll use the ‘map’ method on the array prototype to do this. It creates a new array of components that React will render. In the ListDisplay component’s showWidget method, add the map function to create new ListItems.
17. Sort data by value
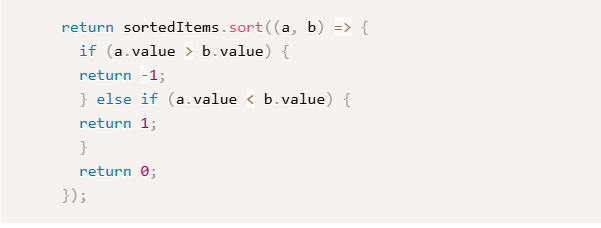
We shouldn’t rely on the data source to provide sorted information – we need to ensure users get useful, organized data. We can add a sorting function in the sortListItems method to handle this.
Array sorting functions compare two values. Apply this to sortedItems and return the result to sort content in descending order.
18. Add a Graph widget
Graph widgets make large datasets easier to read than number or list widgets. We’ll use Chart.js with a React wrapper that updates as props change.
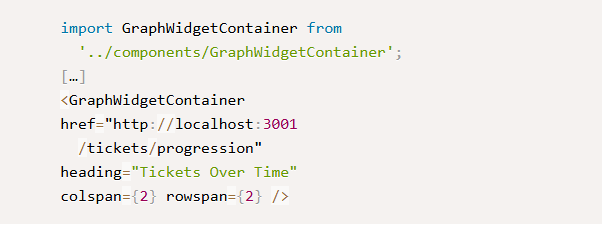
Go back to App.js, import GraphWidgetContainer, and add it to the render function below the existing widgets.
19. Prep data for display
Chart.js expects data in a specific format. Here, the ‘datasets’ array is a collection of points used to draw a line. We’ll use state to store all Chart.js configuration data and update it with datasets from the URL (which arrive in a different format).
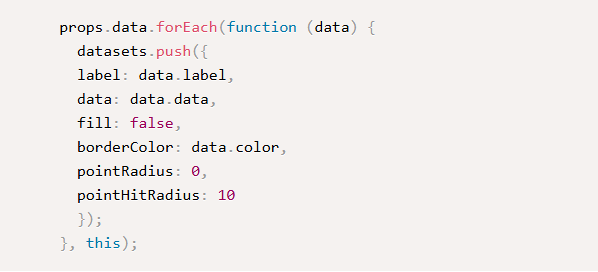
Open GraphWidget.js and loop through the props in generateDatasets to update the state.
20. Regenerate when props change
The React wrapper for Chart.js updates when its props change, but since our state holds the setup, we won’t update those values directly.

componentWillReceiveProps is another lifecycle method that triggers when a component’s props are about to update. It can fire even if values haven’t changed, so a quick check will prevent unnecessary updates.
21. Add the remaining widgets
Finally, we just need to add more data. Thanks to the flexibility of our widgets, we can include whichever ones we need.
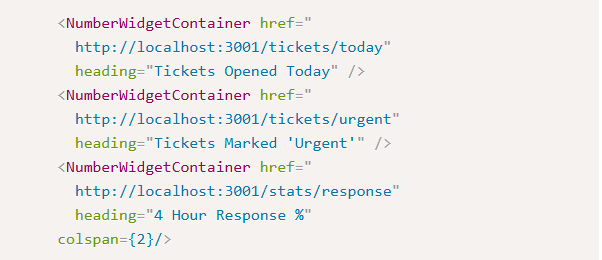
Fill in the remaining spaces on the page. Experiment with widget types, row/column spans, and positions to best fit your data.