
Ready to launch your own podcast? This step-by-step GarageBand tutorial will help you get started in no time.
Podcasts have exploded in popularity since their early days tied to the iPod—yes, that’s where the name comes from! Today, you can tune in anywhere: stream episodes to your phone on the go, listen via your smartwatch, or even play them on a top-tier TV.

What makes podcasts so great is their range: you can dive into global politics, niche hobbies, or anything in between. The best part? With a little time and the right gear, almost anyone can create one. And if you own a Mac or iPad, you already have a powerful tool at your fingertips: GarageBand. Want more audio editing options later? Check out our guide to the best audio editing software.
1. Set Up Your Project
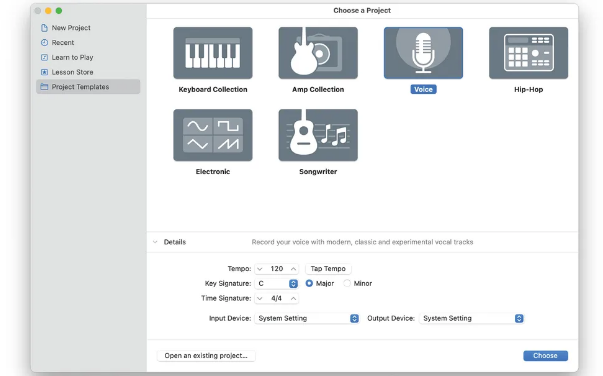
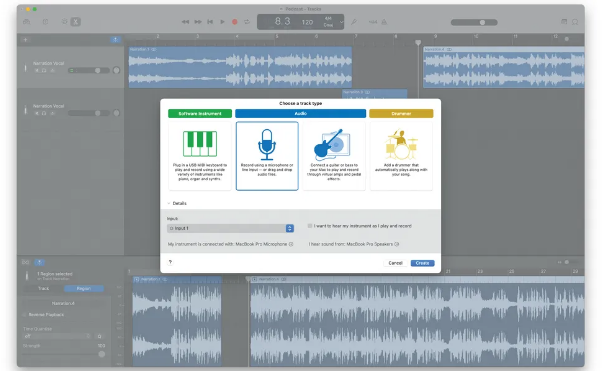
First, plug in your microphone, then open GarageBand. Start by double-checking that your mic appears in the Input Settings menu—this ensures your audio will record properly. Next, double-click the Voice template to open a new project. The template comes with four audio channels, but you probably won’t need all of them right away—save the extras for later if you need them.
2. Test Your Audio Signal
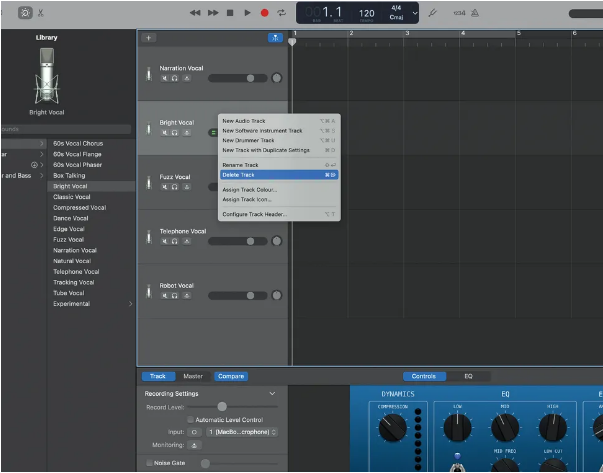
Feedback (that high-pitched squeal no one wants in their podcast) is a common headache—avoid it by wearing headphones or muting your Mac’s speakers while recording. For now, clean up your workspace: ctrl-click on the extra audio tracks (the ones you aren’t using) and delete them. Once that’s done, speak into your mic—you should see activity on the track’s level meter. If there’s no signal, double-check your mic connection or revisit Input Settings.
3. Record Your Voice
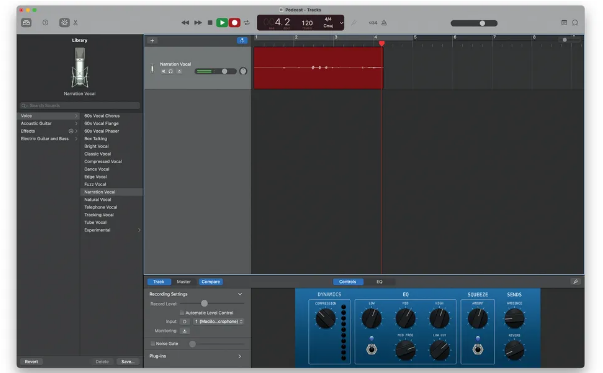
Hit the Record button, then start speaking into your microphone. If your voice sounds too soft (you can barely hear it) or too loud (it’s distorted), adjust the volume: tweak the dial on your mic, use your audio interface (if you have one), or adjust the level directly on the audio track in GarageBand. Take a quick test recording first—this helps you fix levels before you dive into your main content.
4. Edit Your Recording
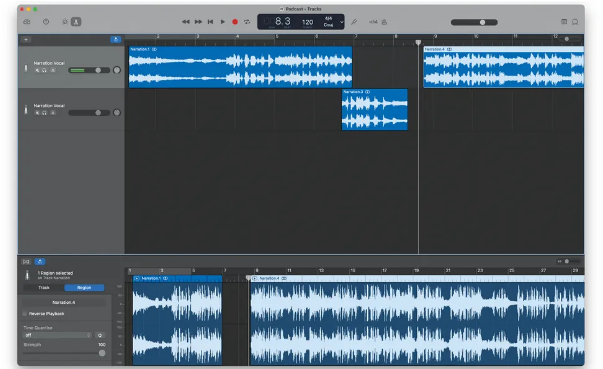
Once you have a vocal track, it’s time to trim and rearrange. Move the playhead (the vertical line that marks where playback is) to the spot where you want to cut, then press cmd+t—this splits the clip cleanly. You can drag and drop these chopped sections anywhere: rearrange a messy take, delete awkward pauses, or even move clips to new audio tracks if you want to reorganize your content.
5. Add Additional Tracks
Need to record more dialogue (like a guest’s voice) or set up multiple mics? Click the + button at the top of the screen to add a new audio track. While recording a new track, use the mute controls on existing tracks to silence any audio you don’t want to capture—this prevents background noise from ruining your new take.
6. Arrange Your Audio

Now, polish your podcast so every participant’s voice is clear. Use the editing trick from Step 4 to rearrange tracks (e.g., fix a time when two people talked over each other). Then, use the level controls on each audio track to balance volumes—you don’t want one person to be drastically louder than the others. Once you’re done recording, switch back to your Mac’s loudspeakers to listen to the full mix and make sure it sounds balanced.
7. Add Music (Like a Jingle)
A short jingle or soft background music can make your podcast feel more professional—especially if you want it to fade out as you start speaking. First, import your music track into GarageBand. Select the music track, then click the Show Automation button (it looks like a mixer slider icon). In the drop-down menu, select Volume—a yellow line will appear along the entire length of the music track. This line controls how loud the music is.
8. Fade Out the Music Intro

To make the music fade smoothly: click the yellow Volume line to add a control point where you want the fade to start (e.g., right before you begin speaking). Then add a second “end” control point where you want the fade to finish. Drag that end point all the way down to the bottom of the track—now the music will fade gently between the two points, making room for your voice without cutting out abruptly.
9. Fine-Tune and Export Your Podcast
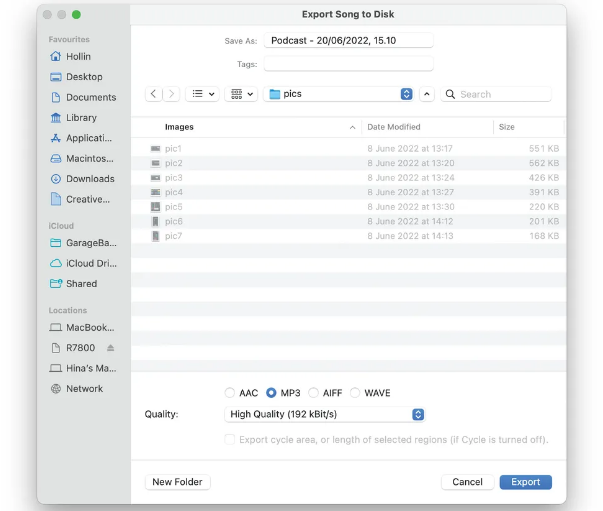
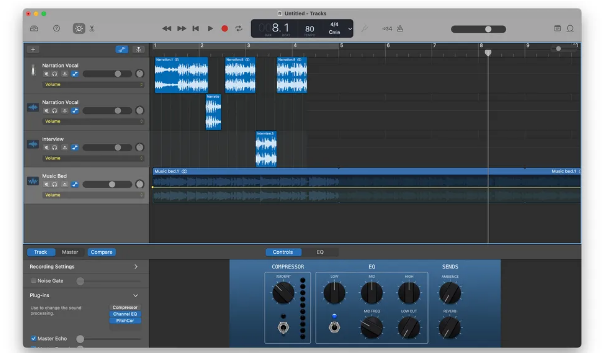
Give your tracks a final polish: for each track, go to the Effects tab to tweak the sound. A great tool here is the Equaliser (EQ)—use it to shape audio (e.g., make voices sound crisper by boosting mid-range frequencies). When you’re happy with the mix, go to Share > Export Song To Disk. Choose between two formats:
- Compressed MP3: Perfect for sharing online (it’s small and works on all devices).
- Full-quality AIFF: Great if you want to save a high-resolution copy for future edits.