Whether you’re a professional looking to brainstorm concepts or a hobbyist exploring digital design, Adobe Illustrator’s Text-to-Vector Graphic tool opens up new creative possibilities. This feature allows anyone—even those new to vector graphics—to generate detailed illustrations from simple text descriptions in just minutes. While professionals may use it for mockups or early-stage ideation, the results are fully editable and perfect for experimentation, making Illustrator more approachable for designers at every level.
Here’s how to get started with Text-to-Vector Graphic, step by step.
Step 1: Access the Tool
Since Text-to-Vector Graphic is still in beta, it isn’t visible by default. To enable it, go to Window > Text to Vector Graphic to open the panel. Alternatively, activate the Contextual Bar via Window > Contextual Bar—this stays on and appears below any selected object or frame. Begin by drawing a frame on your artboard. The frame size isn’t critical since vectors are scalable, but consider the aspect ratio based on your final use (e.g., square for Instagram, 16:9 for video).
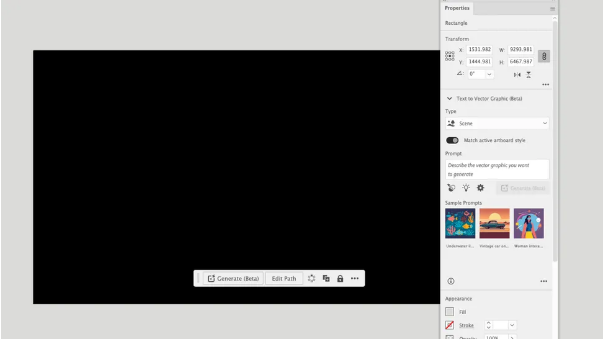
Step 2: Choose a Graphic Type
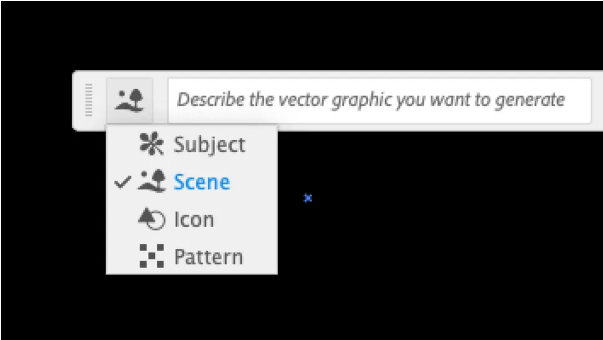
If using the Contextual Bar, click the Generate (beta) button to reveal the options (this step is automatic in the Properties panel). Select the type of graphic you want to create: Scene, Subject, Icon, or Pattern. For full illustrations, starting with “Scene” often works best, as it establishes setting and perspective.
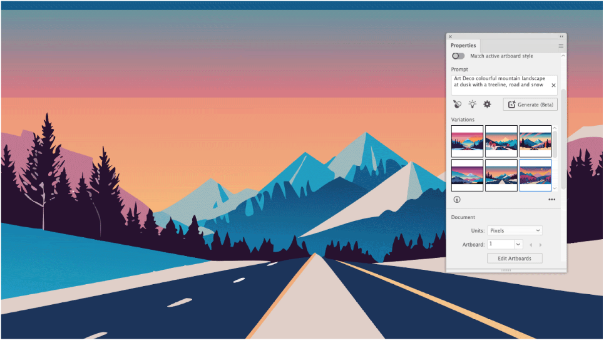
Step 3: Write Your Prompt
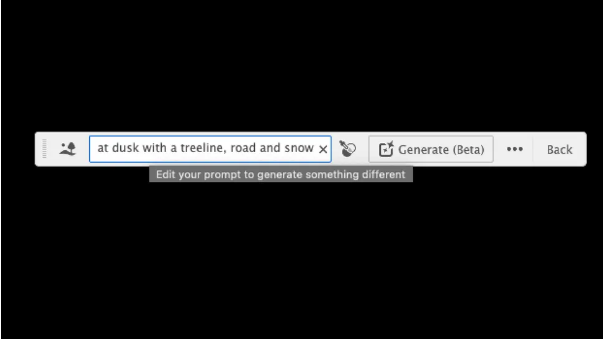
Enter a descriptive text prompt—the more specific, the better. Include details like environment, art style, time of day, and key elements. For example: “Colorful Art Deco mountain landscape at dusk, with a road, trees, and snow.” To match an existing style, drag an image onto the canvas and use the Style Picker. The Properties panel also offers sample prompts and a Detail Level slider (default is 3 out of 5).
Step 4: Generate and Review

Each time you click Generate, Illustrator creates three variations. Use the arrows in the Contextual Bar or preview thumbnails in the Properties panel to browse results. The tool is still learning, so you may occasionally get imperfect graphics—don’t forget to rate outputs to help improve the AI. If you’re not satisfied, tweak your prompt and generate again. Note: Each generation uses a small number of Adobe credits. While you won’t fully run out, exceeding your allowance may slow down processing.
Step 5: Build Out Your Design

Add subjects or objects to expand your scene. New elements will automatically match the style of your current artboard (this can be disabled in Properties). Finding items that fit your scene’s perspective may take a few tries—stay flexible and experiment with different prompts.
Step 6: Refine Your Graphic
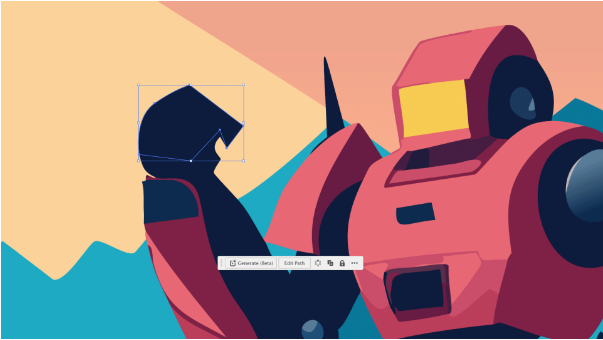
If you’re only creating a storyboard or sketch, you might stop here. But for polished work, inspect your vectors closely. It’s common to find extra shadows, uneven shapes, or small errors. Use Illustrator’s editing tools to delete unnecessary parts, smooth paths, or adjust colors as needed.