Master the essentials of Grav CMS to lay the groundwork for your own website or blog—no heavy databases required.
Content management systems (CMS) are the backbone of the modern web. Platforms like WordPress and other hosting-backed tools power millions of sites, offering user-friendly graphical interfaces for non-technical folks to add content while developers handle the code separately. It’s similar to using a streamlined website builder, but with more flexibility.
The catch? Many CMS tools are weighed down by unnecessary bloat or force developers into inefficient workflows. Even a simple landing page built with a traditional CMS relies on a database, making migration and day-to-day management more cumbersome than it needs to be.
Enter Grav: a CMS designed to be lightweight, flexible, and completely database-free. Don’t let that fool you—Grav still offers an optional admin panel with a intuitive GUI, user management, and all the core features you’d expect from a top-tier CMS.
Instead of relying on MySQL or similar database software, Grav stores content in folders and plain text files. Content is written in Markdown, while configuration settings live in YAML files. (If you need cloud storage for extra content, explore these reliable options.)
Like any new tool, Grav takes a bit of practice to master. While the documentation is improving, it still leaves some questions unanswered—often forcing users to sift through pre-built “skeletons” for guidance. This step-by-step tutorial will walk you through installing Grav, adding pages, and customizing the default Quark theme.
01. Set Up Your Local Environment
Grav requires a web server (Apache or Nginx) and PHP version 7.1.3 or higher.
Install a local server stack like WAMP (Windows), MAMP (macOS), or LAMP (Linux) to get started. You’ll also need Git and Composer installed—make sure both are accessible via the command line.
02. Create a Working Directory
Inside your local server’s web root folder, create a new directory named “Grav-project.” Open your terminal or command prompt and run php -v to verify PHP is installed.
If no version number appears, double-check your PHP installation before proceeding.
03. Install Grav
The simplest way to install Grav is to download the ZIP file from the official website and extract it into your “Grav-project” folder.

For a deeper dive, use the Git installation method to explore Grav’s command-line interface (CLI). Navigate to your server’s web root in the terminal and run the required Git command.
04. Install Dependencies
Skip this step if you used the ZIP installation. Navigate to your “Grav-project” folder in the terminal, then use Composer to install the necessary dependencies.

Once dependencies are installed, use the Grav CLI to set up the theme and plugins. Note: On Windows, prefix all Grav commands with php.

05. Test Your Installation
Access Grav by opening localhost/Grav-project in your web browser. You should see the Grav welcome screen.
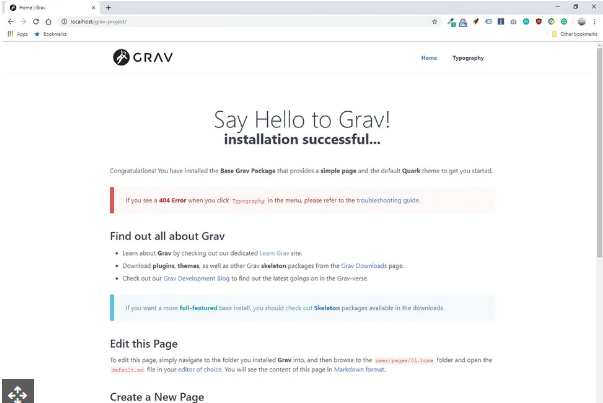
Click the “Typography” page to check for errors. If you encounter a 404 error, refer to Grav’s official troubleshooting documentation for fixes.
06. Add a New Page
In Grav, pages are text files stored in the user/pages directory. To create a new page:
- Navigate to Grav-project/user/pages.
- Create a new folder named 03.about.
- Inside that folder, create a file called default.md.
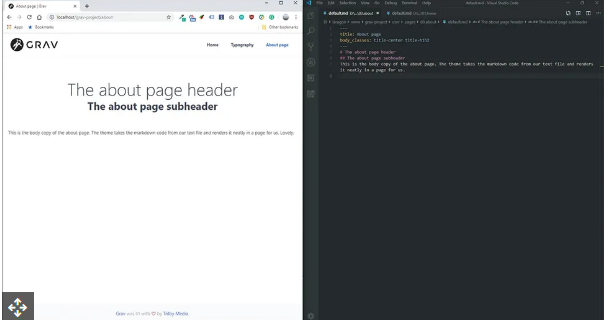
Grav uses Markdown to render page content—familiarize yourself with the syntax if you haven’t already.
07. Install the Admin Panel
To streamline content creation and unlock Grav’s full user-friendly potential, install the admin panel module. Run this command in your terminal:

08. Create an Admin User
After installing the admin module, refresh any page on your Grav site. You’ll see a prompt to create an admin user. Fill in your details, save your password, and proceed to the dashboard.

09. Edit Pages via the Admin Interface
With the admin panel set up:
- Click “Pages” in the left-hand sidebar.
- Select the “About” page you created earlier.
You’ll land on a straightforward content editor where you can modify text, add media, and adjust page settings with ease.
10. Add Child Pages
Delete the default “Typography” page via the admin panel, then create a replacement:
- Click “Add” to create a new page.
- Enter “Services” as the title and folder name, then click “Continue” (keep default settings).
- Add your content and click “Save.”
- Create another page using the “Add” button, enter a specific service name, ensure “Visible” is set to “Yes,” and finish setup.
11. Set the Homepage to Modular
For more complex websites (beyond basic text and headers), convert the homepage to a modular layout:
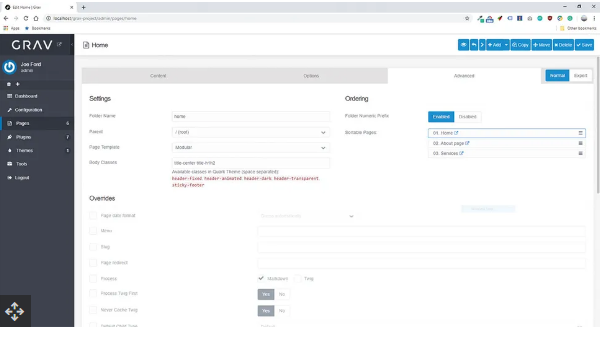
- Edit the homepage in the admin panel.
- Go to the “Advanced” tab.
- Change the page template to “Modular.”
- Save your changes.
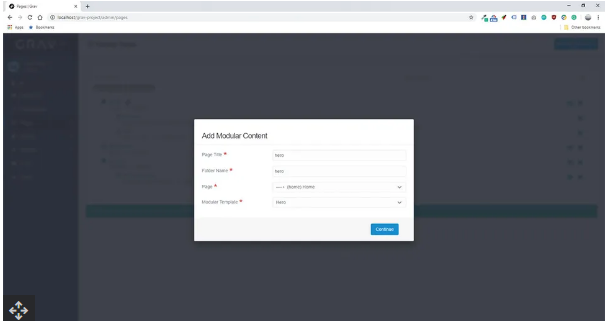
12. Add a Modular Block
Modules are theme-specific content blocks that let you create styled sections on your page. Here’s how to add one:
- Delete the pre-existing homepage content and save.
- Click “Add” > “Add Modular” at the top of the page.
- Enter “Hero” as the title, set the parent page to “Home,” and select the “Hero” template.
- Save your changes.
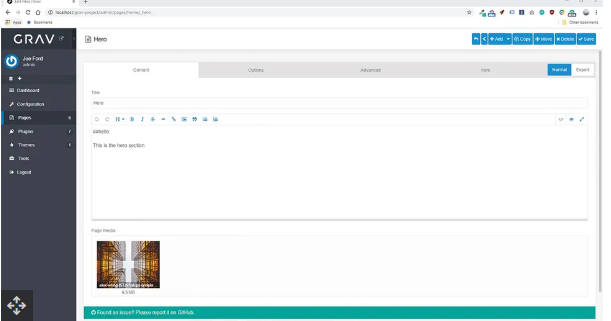
13. Customize the Hero Module
Modules act like subpages in the admin panel but render as content blocks on the parent page. Edit the hero module to:
- Add a header and descriptive text.
- Upload a hero image via the “Page Media” section.
- Save your edits.
14. Add a Features Module
Repeat the modular block process, but select the “Features” template this time. When editing:
- Use the “Features” tab to choose a layout.
- Add four columns, each with an icon, header, and text.
- Save your changes.
15. Add a Text Block
Finish the homepage with a standard content block:
- Add a new modular block (select the default text template).
- Enter your desired content and attach an image.
- Save the page.
Final tweak: For each block (including the homepage itself), go to the “Advanced” tab and clear the “Body Classes” field to remove default theme CSS classes (you can add custom classes later if needed).
16. Configure Site Settings
To personalize your site:
- Navigate to the “Themes” menu and select Quark (the active default theme).
- Adjust theme-specific settings (like colors or layout).
- Click “Configuration” to update core options like your site title and logo.