Our design editor, Daniel John, recently called Substack “the best corner of the internet”—and I couldn’t agree more. After weeks of back-and-forth, I finally launched my first Substack, focused on living with bipolar disorder. But here’s the thing: setting it up was way trickier than I expected, thanks to hidden settings and a few head-scratching choices in Substack’s interface. To be fair, most blogging platforms feel confusing (WordPress, I’m side-eyeing you), but Substack’s “guided” setup left out a lot of steps that make or break a personal, polished newsletter.
The platform walks you through the basics—like turning on paid subscriptions (Dan even wrote a great piece on why you should do that)—but if you want your Substack to stand out and feel yours, you’ll need to dig deeper. Below are the overlooked steps that helped me refine my newsletter, and that I think are key to making yours a success:
01. Categorize Your Substack (It Matters for Discovery)
Categories help readers find your work—so picking the right ones is non-negotiable. The catch? If your newsletter only fits one category, you might hit a snag. My bipolar-focused Substack, for example, fits perfectly in Health and Wellness, but there’s no other category that feels right.
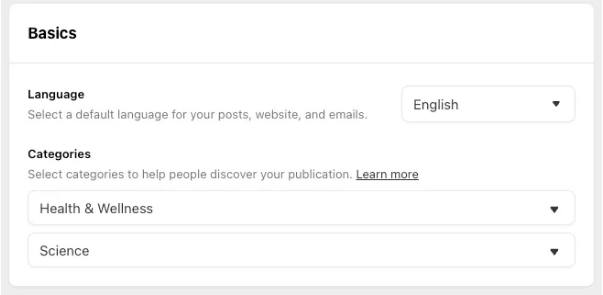
Here’s a quirk: You can leave the second category blank, but once you select something, you can’t “unselect” it. I first picked Education (total mistake) and tried to revert to nothing—no luck. Now it’s in Science, which isn’t ideal, though it technically touches on psychology.
Pro tip: Your first category is the most important. I could potentially be a “bestseller” in Health and Wellness (fingers crossed!), but that wouldn’t happen in Science. To add categories, go to Settings > Basics > Categories.
02. Tweak Your Website Settings (Don’t Overlook the Small Stuff)
The “Website” tab has a handful of settings you’ll want to adjust—and some are easy to mix up. First, your Publication Logo: This is different from your avatar! Your avatar is the round image that shows up on the right side of your Substack, while your logo is a square image that lives on the left.
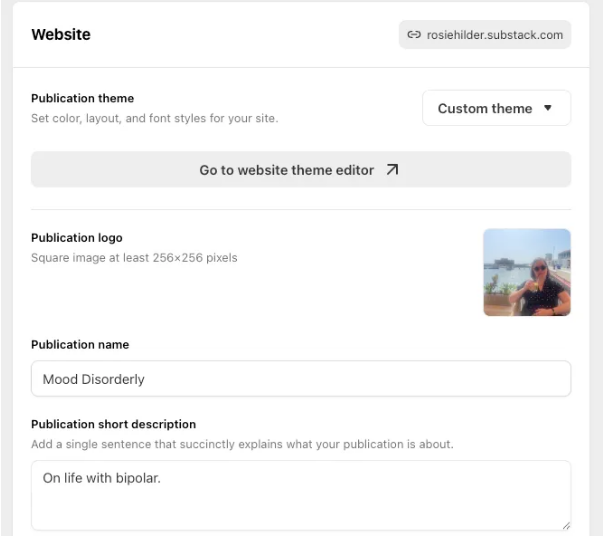
This is also where you’ll add your publication name, short description, and a “wordmark”—another element that’s separate from your logo (yes, it’s confusing at first).
Under Pages and Navigation, don’t forget to update your About page (more on that next!). You can also add custom pages here and edit your tags—if you want a clear breakdown of how Substack’s tagging works, this article explains it perfectly.
03. Update Your About Page (Generic Text Won’t Cut It)
I didn’t even realize I had an About page at first—and I still need to finish updating mine (maybe it’s done by the time you’re reading this!). You can edit it by going to Website > Pages and Navigation > About page.
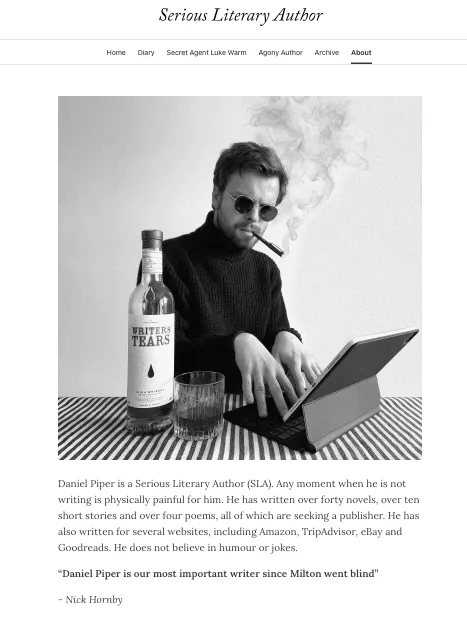
If you skip this, your About page will have generic Substack text—which does nothing to tell readers what your newsletter is really about. A good About page is a chance to connect: it can explain your mission, your voice, and why your work matters. Daniel (aka the Serious Literary Author) has a fantastic example of a well-done About page—check it out for inspiration.
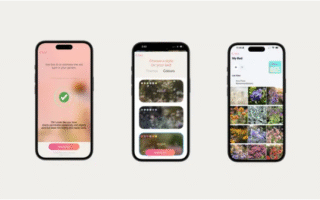
04. Polish Your Welcome Page (It’s Your First Impression)
Your Welcome page is not the same as your About page or Welcome email—it’s what people see when they visit your Substack directly. Mine looks like this (see above), and you can customize the Welcome photo here to match your vibe.
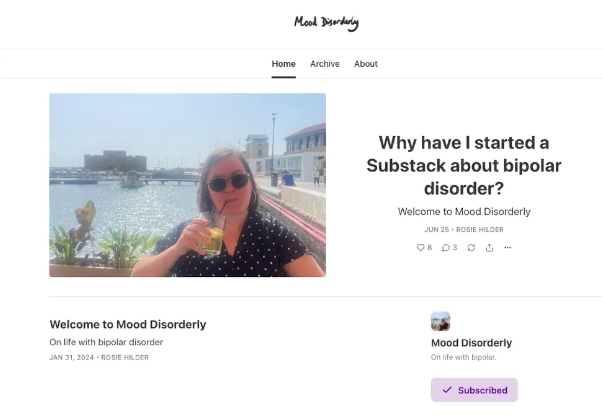
Think of it as your newsletter’s “front door”—it should feel inviting and give visitors a quick sense of what you’re all about.
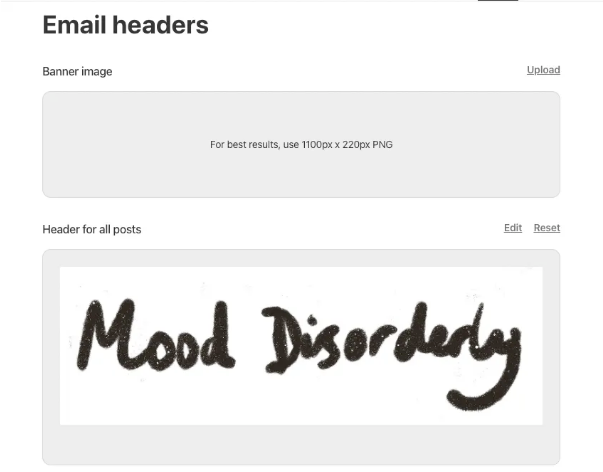
05. Add a Personalized Email Header and Footer
Want to make your emails feel more cohesive? Add a custom header and footer. I put my Substack’s logo at the top of every email as a header—and it makes a big difference in branding.
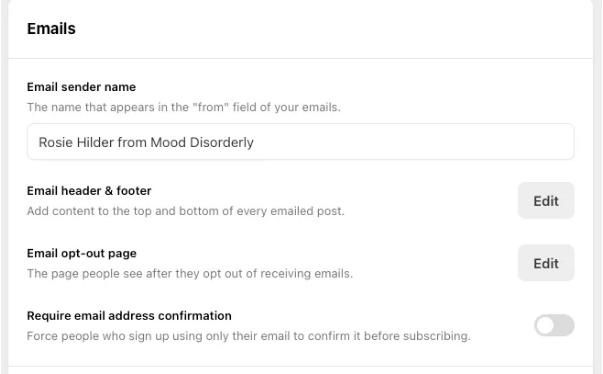
Here’s a heads-up about footers: Substack automatically adds one that encourages readers to sign up or pledge money. If you also use the “button” tool in your posts to add a “subscribe” button, readers will see two buttons at the bottom (double the prompts, but maybe too many).
Instead, create your own footer to guide readers exactly what you want them to do—subscribe, share your post, or upgrade to paid. It will show up on every post, so you won’t have to repeat yourself or add extra buttons. Find these settings under Emails > Edit header and footer.
06. Customize Your Welcome Emails (Don’t Leave Subscribers Hanging)
When I launched my Substack, I had no idea Welcome emails existed—until I already had a few subscribers. Then I signed up for another newsletter, got a warm Welcome email right away, and thought, “Wait, do I have one of these?”
Turns out, you can absolutely customize your Welcome emails—and Daniel (again, the hero here) pointed me in the right direction. Go to Emails > Welcome emails to tweak what free and paid subscribers get when they sign up. A word of caution: I accidentally updated the paid subscriber email instead of the free one at first, so double-check which one you’re editing!
07. Manage Your Notifications (Avoid Inbox Overload)
If your Substack gains traction, you might get flooded with notifications. To avoid feeling overwhelmed, go to Settings > Notifications to pick which alerts you want.
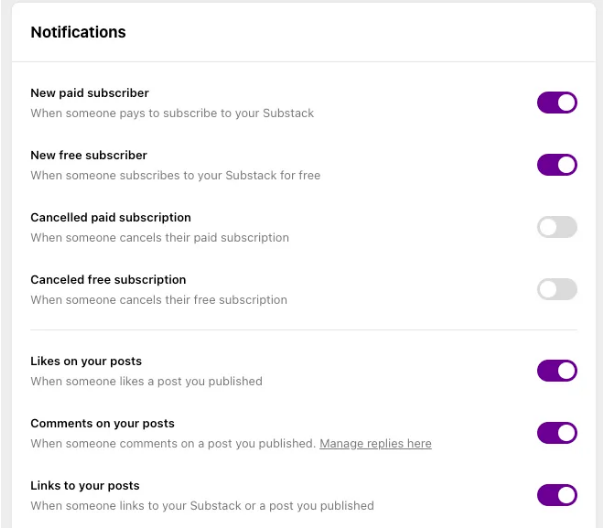
Here’s the confusing part: Substack doesn’t clearly label which notifications come via email vs. in-app. After staring at the UI for a minute, I figured out the top half are email notifications, and the bottom half are in-app. Adjust accordingly—you don’t need to be pinged every time someone likes a post!